Upton Roof Replacement: Re-Roofing a Solar-Powered Colonial Before the Panels Go Back Up
Roofing Project at a Glance
- Location & building: A two-story Colonial with an attached garage wing, a brick chimney, and a rooftop solar array in Upton, MA, plus a detached shed
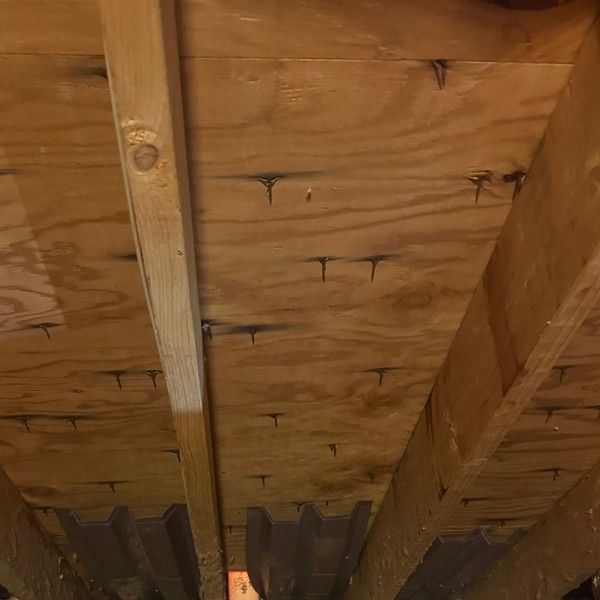
- Problem: A worn 3-tab roof under the solar panels, with heavy granule loss, moss and lichen on the shaded rear slope, saturated felt underlayment, and black water rings around the roofing nails on the underside of the deck
- Solution: Full tear-off to the plywood deck, a new leak barrier and synthetic underlayment with a double layer where the panels mount, new flashing and ridge vent, permanent roof anchors for the solar crew, and the shed re-roofed at the same time
- Result: A new roof that is ready to carry the solar array for years to come, so the panels never have to come off again for a worn-out roof underneath
- Key lesson: If you have solar, or are planning it, the roof under the panels needs to outlast them
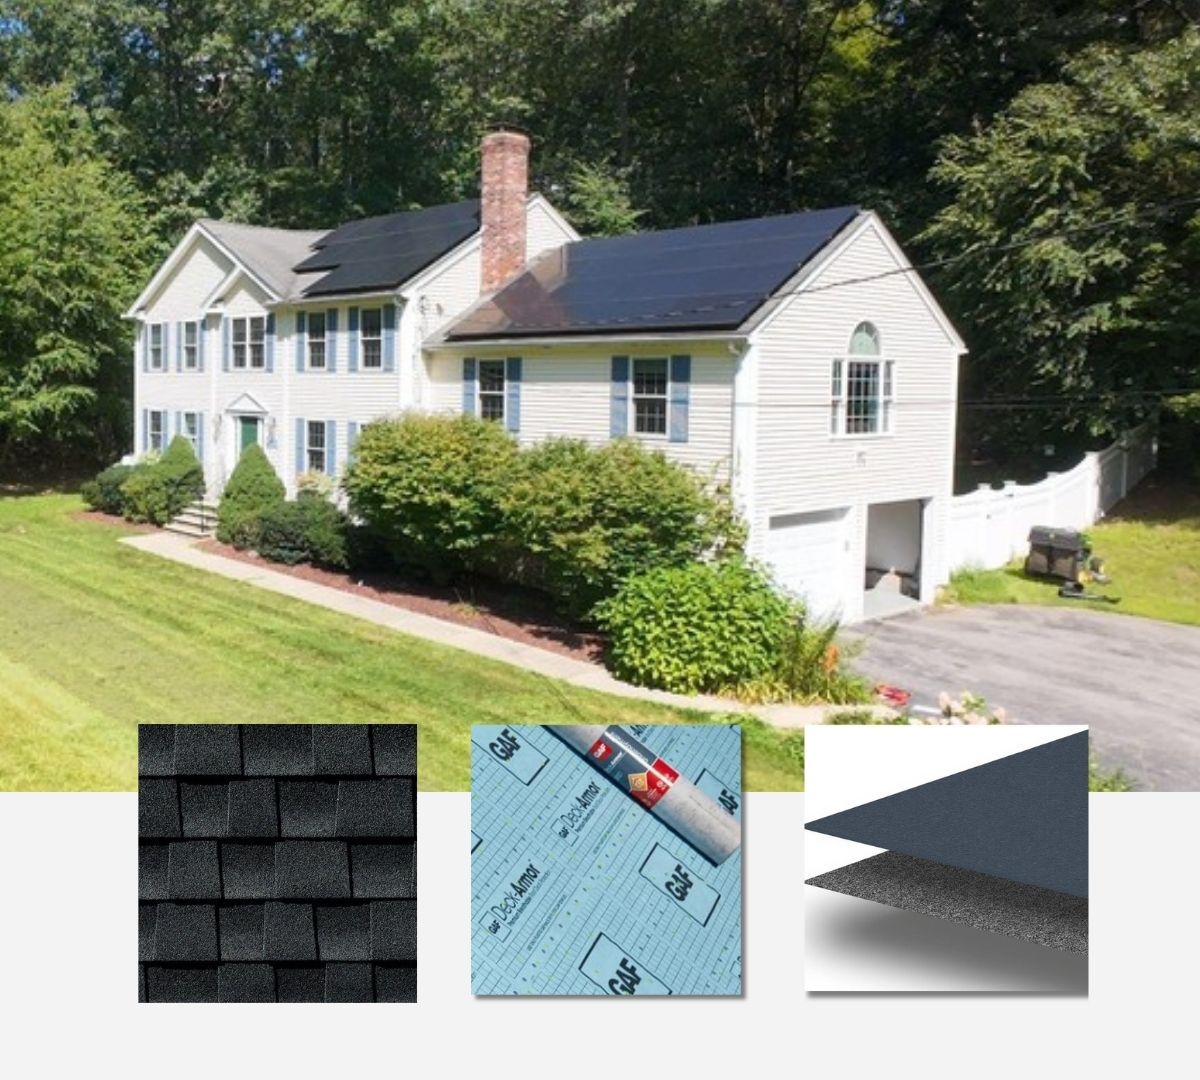
GAF Materials Used
- Roof Size: 23 SQ
- Shingles: GAF Timberline HDZ
- Shingle Color: Charcoal
- Ridge Cap: GAF Timbertex
- Leak Barrier: GAF StormGuard
- Underlayment: GAF Deck-Armor
A Worn 3-Tab Roof Under a Solar Array, Replaced the Right Way
Solar panels are built to last 25 years or more. The roof underneath them often is not. That was the situation at this Upton Colonial: the homeowners had a solar array working hard on the front of the house, sitting on top of a 3-tab roof that was wearing out underneath it.
Once panels are on a roof, every roof problem gets harder and more expensive to fix, because the array has to come off first. So when the homeowners called Master Roof, the goal was simple: replace the roof once, do it right, and set it up so the solar could go back on and stay on.
Roofing Project Specifications
| Item | Description |
|---|---|
| Home Style | Two-story Colonial with attached garage wing and brick chimney |
| Special Conditions | Existing rooftop solar array; roof work coordinated with the homeowners' solar provider |
| Scope | Full tear-off and roof replacement on the house, plus the detached shed |
| Previous Roof | 3-tab asphalt shingles over felt (tar paper) underlayment |
| Roof Deck | Original CDX plywood, inspected after tear-off |
| Asphalt Shingles | 3-tab shingles |
| Leak Barrier | GAF StormGuard leak barrier at eaves, valleys, and other vulnerable areas |
| Underlayment | GAF Deck-Armor breathable underlayment, with a double layer where the solar racking mounts |
| Ventilation | New GAF ridge vent replacing the existing ridge vent |
| Flashing | Three-layer chimney flashing; underlayment run up behind the vinyl siding at sidewalls |
| Solar Prep | Permanent roof anchors left in place so the solar crew can tie off without walking on or damaging the new roof |
| Site Care | Existing siding, fence, and entry photographed before work began; ground tarps along the house and landscaping |
What the Master Roof Inspection Found
Estimator Nicolas Banks inspected the roof from the drone, the roof surface, and the attic. Some of what he found was good news. Most of it confirmed the roof was nearing the end of its life:
- Water rings around the nails: From the attic, the underside of the roof deck showed dark circles around the roofing nails. That staining is one of the earliest signs that water is getting through the shingles and underlayment and following the nails into the deck.
- A plywood deck worth saving: The good news was that the deck was CDX plywood, not OSB. Plywood holds up far better to occasional moisture, so the staining had not turned into soft or swollen sheathing.
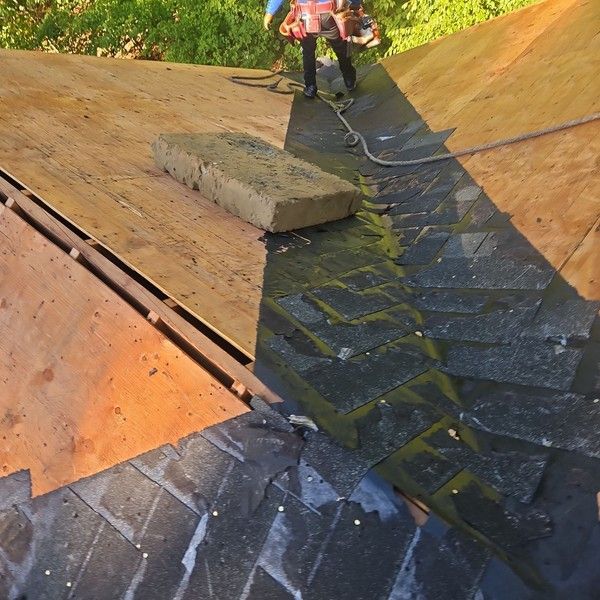
- Saturated felt underlayment: Water stains showed the old tar-paper underlayment had been taking on water. Felt holds moisture like a sponge, and in shade that moisture feeds moss and algae.
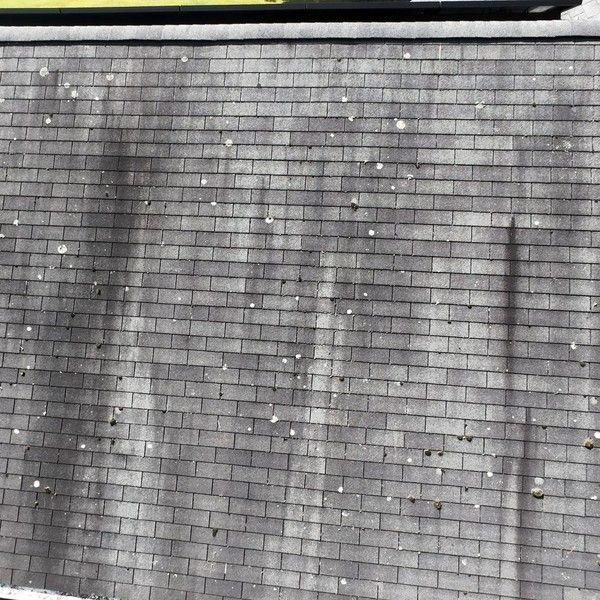
- Moss and lichen on the rear slope: The back of the house gets far less sun, and that slope was covered in moss and lichen growing in the worn shingles.
- Heavy granule loss: Discolored, patchy shingles across the roof showed where the protective granules had worn away.
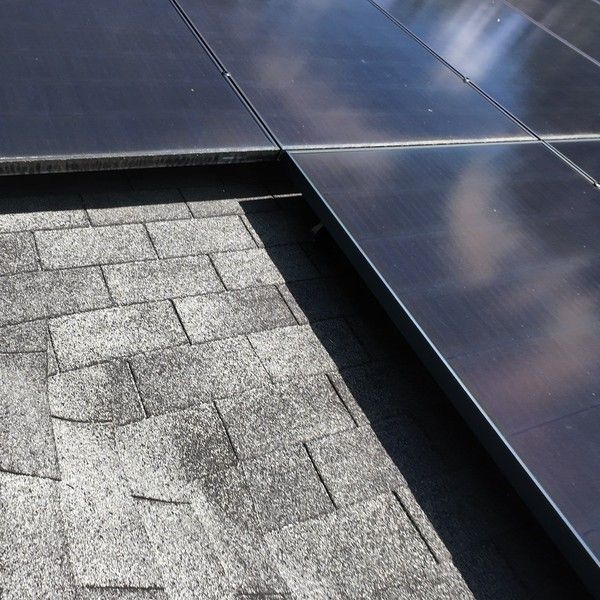
- Solar sitting on aging shingles: The array was mounted over the same worn 3-tab shingles. Any leak under the panels would have been hard to find and harder to reach.
- Chimney and sidewall flashing: The brick chimney and the places where the roof meets the vinyl siding needed new flashing as part of a full replacement.
- A sound ridge vent design:
The existing ridge vent was installed correctly. It only needed to be replaced with a current GAF ridge vent, not redesigned. See why
roof ventilation matters
Planning Around the Solar Panels
A roof replacement under solar takes more planning than a standard job. The panels had to come off before the tear-off and go back on after the new roof was in, so we planned the schedule with the homeowners and their solar provider. On our end, that plan included two solar-specific steps:
- A double layer of underlayment under the array: Solar racking is fastened through the roof. We put down a second layer of underlayment in the panel area for extra protection around every racking attachment.
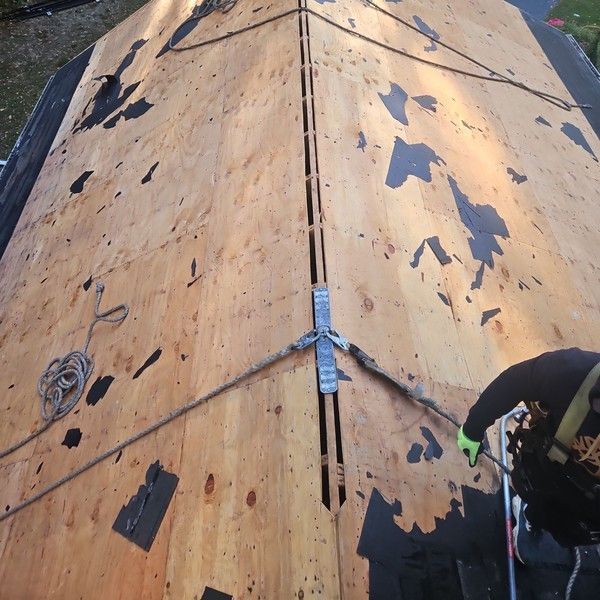
- Permanent roof anchors: Anchors left in place at the ridge give the solar crew a safe tie-off point now and for any future service, without walking on or damaging the new roof.
The Master Roof Solution
- Before-work documentation: The crew photographed the siding, fence, and front entry before starting, so the homeowners had a record of existing conditions.
- Complete tear-off: The old shingles and saturated felt were stripped to the plywood deck, which was then inspected sheet by sheet. The CDX plywood had held up, so the solid deck was kept as the base for the new roof.
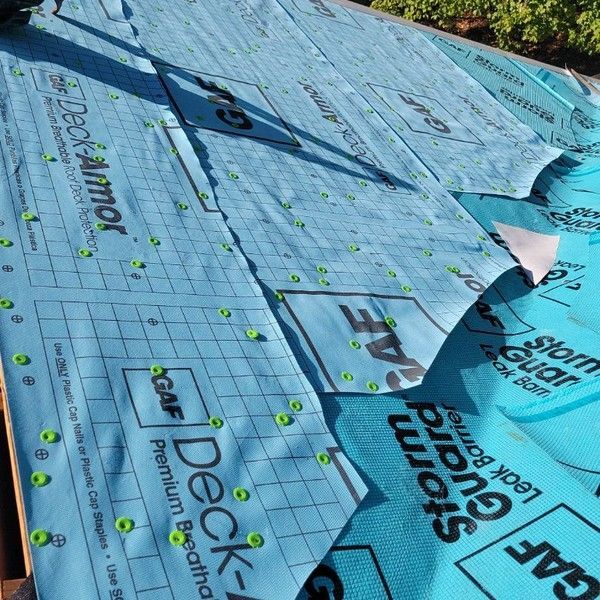
- Leak barrier and synthetic underlayment: GAF StormGuard leak barrier went down at the eaves, valleys, and vulnerable areas, and breathable GAF Deck-Armor underlayment covered the rest of the deck, replacing the old felt. Deck-Armor lets moisture vapor escape from the deck instead of trapping it.
- Extra protection for the solar area: A second layer of underlayment was installed where the panels mount.
- New shingles: A new architectural shingle roof replaced the worn 3-tab shingles across the main house and the garage wing.
- Flashing done right: The chimney was flashed in three layers: ice-and-water membrane wrapped six inches up the brick, aluminum step flashing at every shingle course with lead at the corners, and new counter flashing. At the sidewalls, the underlayment runs up behind the vinyl siding to keep water out of the walls.
- New ridge vent: The existing ridge vent was replaced with a current GAF ridge vent.
- Roof anchors left for the solar crew: Permanent anchors stay at the ridge so the solar installer can work safely.
- The shed, too: The detached shed was re-roofed as part of the same project.
The Result
The homeowners now have a new roof under their solar array, built to protect the house for decades. The moss, the wet felt, and the water tracking down the nails are gone, and the plywood deck that had been quietly taking on water is now covered by a modern leak barrier and breathable underlayment.
Just as important, the roof and the solar array are finally on the same timeline. The panels go back onto a new roof with extra protection under the racking and permanent anchors for future service, instead of onto shingles that would have needed replacing in a few years.
Problems We Solved
Frequently Asked Questions
Should I replace my roof before installing solar panels?
If your roof is more than about halfway through its expected life, it usually makes sense to replace it first. Solar panels are designed to last 25 years or more, and removing and reinstalling an array later to replace the roof underneath adds significant cost. A roof inspection before you sign a solar contract tells you whether your roof will outlast your panels.
What happens to my solar panels during a roof replacement?
The panels and racking are removed before the tear-off, usually by the solar installer or a solar service company, and reinstalled once the new roof is in. The roofer and the solar company coordinate the schedule so the house is never left exposed and the array is off the roof for as short a time as possible.
Why put a double layer of underlayment under solar panels?
Solar racking is fastened through the roof, and every fastener is a potential leak point. A second layer of underlayment in the panel area adds another barrier around those attachments, in the one part of the roof that is hardest to inspect and repair once the panels are on.
What are permanent roof anchors, and why leave them on the roof?
Roof anchors are fixed tie-off points, usually at the ridge, that a worker can clip fall protection to. Leaving them in place means the solar crew, or anyone servicing the roof later, can work safely without installing new anchors through the new roof each time.
What do black rings around the nails in my attic mean?
Dark circles around nail tips on the underside of the roof deck usually mean water is getting past the shingles and underlayment and running down the nails, or that warm, moist attic air is condensing on the cold nails. Either way, it is worth having a roofer look at the roof and the attic ventilation before the deck itself starts to deteriorate.
Why does moss grow on the back of my roof but not the front?
Moss needs moisture and shade. North-facing and tree-shaded roof slopes stay damp longer after rain and dew, and older shingles that have lost their granules, especially over felt underlayment that holds moisture, give moss an easy place to take hold. Moss holds even more water against the roof, which speeds up the damage.
Is CDX plywood decking better than OSB?
Both are common roof deck materials, but CDX plywood generally tolerates occasional moisture better than OSB, which can swell at the edges when it gets wet. On this home, the plywood deck had water staining but was still sound, so it could be kept under the new roof.
Other Roofing Projects in Upton & Surrounding Towns
Master Roof has worked on homes and buildings all over Upton, including a full roof replacement for the local VFW Post. Here are more recent projects from Upton and the surrounding towns.

Have solar, or planning to add it?
Talk to us before the panels go up. Get a ballpark with our roof cost calculator, or schedule a free inspection and we will tell you honestly whether your roof will outlast your panels.